Use the links on the table of content to navigate.
Table of Content
Boats and bartering
Bartali adventure log Summary guide
Energy and it's uses
Goldbars and exchange rates
How do I walk around in my underwear or bikini ?
Misc/ trash loot exchange rates
How to cook / do alchemy.
Levelling Guide
Mirumok Advanced Leveling guide for fastest leveling experience
Knowledge and energy
How to get more Silver? (life skill guide/breakdown included)
Node uses and how to activate
Strength, Breath and Health
Trading guide
How do I know if I'm hitting a monster?
Houses it's and uses
Upgrading pet tier
Amity
Workers
Enhancing Guide
Gearing
Energy and it's uses
In BDO, Energy is relatively important, if you know where to invest it in, it can be converted in to silver in many ways.
For example, you can gather resources like meat/logs/ores/plants using energy and either proccess them/ cook or do alchemy to gain income or you could use 50 energy to roll for a gear you need from Patrigo (night vendor that spawns after 10pm game time *ps game time is not the same as sever/real time*)

*do note that patrigo has a low chance of offering boss gear or boss weapon of your choice.* and lastly node investment for trashloot and/or rare drop increase. (node investment max level :10)

Unlike many other leveling systems that uses percentage(%) to indicate how close you are to the next level, Energy is gained via completing 'sets'
Press 'H' to open up Ecology / knowledge info, open up one of the many tabs, on the side there are numbers that indicate how much energy you would get from completing a set. (eg 3 = 3 total energy to be gained)

Goldbar and exchange rate
What should I do with my gold bars/ how to exchange/ sell them for silver?
Gold bar(s) :
1g = 100k silver
10g = 1mil silver
100g = 10mil silver
1000g = 100mil silver
exchange rate = 10% of silver cost (eg to exchange 100k silver to 1 gold bar you need 100k silver + 100, and 1000 for 1mil etc.)
You can only exchange goldbars for silver or vice versa using currency exchange available via Storage keepers


Right click to sell/ buy gold bars
Pros of exchanging to/(buying) goldbars
1. You can carry more stuff because goldbars weigh lesser than silver, so if you are over weight with money, change to goldbar
2. you can only transport silver to a different town by changing them to goldbars and using storage keeper to transport the gold bars to a different location
Since majority of the monsters in BDO drop etc that can be traded for silver/goldbars, so you might be wondering:
Return to top
How do I exchange monster etc for silver/ goldbars ?
-Open up your inventory by pressing I
-Hover your mouse over the etc, it'll show you the location
-Or you could just simply right click the item and select the NPC Location button
(usually will have this function unless the etc itself has no exchange rate)

Return to top
Where should I level?
-ps: "grinding may be slower than using training dummies depending on your clear speed." also certain spots may be contested so grind at your own risk" For Training dummies, purchase book of training combat for levels and book of training skill for skill point xp once you've purchased those books, right click to use the books and you can engage the training dummies by pressing "R" (To note : if you disconnect or if the server goes into maintenance, the timer on the book of training will NOT STOP, so only afk dummy train if your computer has a stable internet connection and if there's no maintenance) "Engagable" Training Dummies can only be found in major establishments (Velia, Heidel, Calph, Grana, Altinova, Duverncurve, Valencia) the npc that sells training books are within the training dummy area-
-Before diving into this note that this guide applies for newer players without gear and are soloing without friends to power level - upon hitting lv 50, players from all over BDO can kill you on sight, so I'd recommend you to get a minimum 200-250 total gear score before hitting lv 50.-
1-20 just rush main quest line (if you not interested in side quests (though some of them give Inventory slots))
20-25 Swamp Nagas
25 - 30/35 Red Orcs / Blood monastery
30 - 40 kelpan mine
35+ ~ 45 Marni's lab
45+ ~ 50+ Catfish/ Rhutum/ Mansha/ Shadow knights (this is a hidden area so you can't navigate there/ pm me family name : (kagamiine) if you wanna get there)
(From lv 50 onwards where you lv / grind depends alot on your AP (or total GS, simply cuz if u have low dp high lv mobs/ elite mobs can 2-4 hit ko you.)
Note: (even under lv 50, Gear Score(GS) factors but not as drastically as compared to mobs >50)
With super high gear score?
50-60 Yzrahid/ Gyfin under (if you're a sultan with FGA/RED armors and DEC Sovereign gears)
Progression gear score?
50-53++ Helms (upper)
Or
50/53 ~ 55 Helms (under (cave))
Or
50+ ~ 56 elric's
55(20%) - 56 : Chain quest : Combat promotion, location : Sarma outpost
55+ ~ 60+ Sausans/ pirates (with tri-tet tuvala) and mirumoks / sycria upper (with full pen tuvala)
60+ onwards (depending on AP and DP) solo grindspots : Mirumok/gyfin under/yzrahid, party grind :(3-5 man party) gyfin upper, (2-3man)Elvia Altar Imp, (2-3man)Elvia Castle Ruin,(2-3man) olun/d olun/d2 olun
-Note-
Mirumok 245ap with Tet kutum is a minimum requirement. (pretty achievable since the new pity system for tuvala basically guarentees that you hit full pen tuvala under 16 taps.
60 ++ solo spot Aakman/ hysteria/ sycria abyssal/ Honglim/ gyfin under/ yzrahid
Added info : Guide for Fastest leveling from 60-62 (and even onwards of 62+) in my experience

Legend :
Fuchsia : Towers you might want to ignore while rotating to benefit from all towers within range of xp leech or "WIFI bar" during your speed run(s)
Towers that are similar in colour: High chance to be within Xp leech range of each other.
"?" : May or may not be able to leech xp of the same color marker
Reccomended Number of people for this rotatiton to work : Minimum 3 to a Max of 5
Minimum Req AP for soloing 1 tower by yourself : 265 ^ ap with tet kutum (any other class except guardian and shais; guardians and shais only need 245 ~ 250 ap with tet kutum )
Minimum Req for rotation 9^ tower rot to work : have at least one party member on one tower
this is still viable if you just want xp, however, if you have the gear? it's honestly a lot better to just solo grind at Yzrahid now, the xp multiplier is better there and the Silver/H is probably one of the best too at least like a 1000000 times better than 5 man at mirumok, the silver you get at yzrahid is on par with the likes of d oluns/d2 oluns/ d ash forest/ d2 ash forest all spots pulling in 1.8-2b an hour at minimum.
Return to top
Knowledge and energy
The only way you can increase max energy is to gain more knowledge.
There exists, in BDO 9+ different categories of knowledge
2 of which requires you to explore BDO's continent
the rest are obtained from lvling, last hitting monsters, questing, lifeskilling(processing, cooking, alchemy, fishing, trading, etc)
Your total Knowledge ecology can passively increase your droprate of up to a maximum of 20%.
To check the knowledge types/ the knowledge you've gained, press H
-ecology (Knowledge rank (applicable to trade goods and monsters only))-
Grade S +10 points
Grade A+ +5 points
Grade A +2 points
Grade B + 1 point
Grade C + 1 point
-ecology passive drop rate buff-
Over 500 points + 2%
Over 1000 points + 3%
Over 1500 points + 5%
Over 2000 points + 7%
Over 3000 points + 10%
Over 4000 points + 12%
Over 5000 points + 14%
Over 6000 points + 16%
Over 7000 points + 18%
Over 8000 points + 20%
Where do I get more silver? (life skill guide/breakdown included)
1. Grind (basically finding a place and a rotation catering to your inherent gear that gives you the most income per hour)
2. Proffession (Life skilling (pro : AFK money/ passive income) (con : requires your character to be online to be effective (tip to make this less draining: leave com on when u go out/ sleep/ etc.)))
3. Spamming new mule characters (to do the 1 time quests that gives gold bars)
4. (not tested) Market place broker.
5. dump real $$ into game and sell pets/ requested pearl items on market place. (selling costumes are the best income)(pro : Fastest guaranteed income >250mil in less than 15mins.) (con : you need to be rich in real life)
Life skills guide:
- JUST PICK 1 -
unless you have a flawless memory, then by all means go for all.
Reccomended :
want Afk income?
1. Alchemy (pro : high - very high income) (con : a lot of materials, materials usually hard to obtain)
2. Cooking (pro : moderately - extremely fast and stable income) (con : depending on what you are selling, money may not come in immediately, should you want extremely fast money, you need at least a +3 or a +4 cooking suit, a blue grade sturdy life alchemy stone and above; and if you have the money, the coveted canape p2w costume)
3. Fishing (pro : stable income, can passively increase your trading level which in turn increases the amount you earn per fish, auto fishing does not require you to participate in the mini game.) (con : preferably require you to be in a safe zone unless you out at sea, chances you can get "kidnapped" by players)
4. Horse Training (pro : you attain "dream horse" faster than any other profession) (con : it takes a long time to set up a horse trading empire, workers cannot assist you in anyway for this lifeskill, only maybe looking after your farm as you plant carrots to feed your horses, you need to win mini game to catch a horse)
want semi Afk income ?
also inclusive every Afk ones
1. Barter (pro : high - extremely high income) (con : costs alot to get started, takes a long ass time to invest in, you need 5.1k barters completed in order to have good amount of barter routes and you need carrack in order to make huge amount of income, need a lot of silver and mats for carrack, your boat might get sunken by enemy players if you don't pay attention.)
2. Trading (pro : high - extremely high income) (con : income extremely dependent on distance traveled, trading level and the item you're trading. Income is only really ever "visible" when you trade in chunks, meaning you have to amass a lump sum of tradable items via grinding, gathering, farming or crafting via sending workers to workshops.)
3. Fishing (pro : higher income than afk fishing) (cons : to get loot, you need to win the mini game)
you a no life gamer who spends >18 hours on bdo?
also inclusive of everything said above
1. Gathering. (pro : you gather more resources for materials to cook/craft things faster than workers, there's a chance you may get sharps and hards which can only be attainable thru gathering.) (con : it's taxing and slow to gather without + 5 gathering, usually better gather results if you have magic/ lucky grade tools, which only human workers has a higher chance to produce while crafting, p2w pets such as hedgehog that has an innate passive that has a 30% chance to double proc gathered items and a hermit crab that decreases the chance of durability consumption when gathering is highly recommended to improve your general gathering experience and results)
2. Hunting. (pro : similar to gathering, you use guns while hunting, has a good income) (cons : more of a contested lifeskill(may involve pk) (mobs are fought over especially blue whales))
3. Sailing (pro : Sea monster(s) hunting guild quests and bartering gives, hands down, the best income in the game.) (cons : you need a ship, preferably a upgraded frigate/sailboat, or preferbly a carrack/panox with enough ammunition to fight these monsters, frigate, sailboats, carracks, panox all require ALOT of materials and may take several days, weeks or months to complete depending on your gathering speed and workers tier)
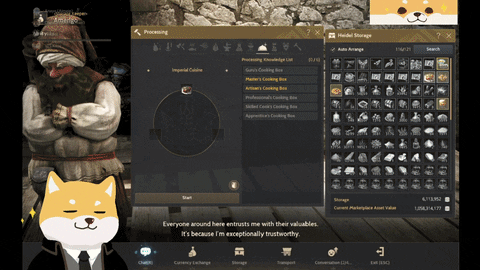
Imperial Delivery
Imperial Cooking/Alchemy/Fishing
Every day, the game allows players to trade in a 'set number(n)' of 'boxes' with npc for a 'fixed price'.


These numbers(n) however can be modified. How? You may ask. Well, to increase your Daily Delivery Quantity (or as i like to call it daily quota/ quota), simply increase your base contribution points as, quota = base contribution points divided by 2
Which in my case.

It's 348/2 = 174 boxes
And to

Now you may be wondering... KAZU!!!! HOW ON EARTH DO I GET THOSE

Now click on the boxes you can craft for eg : master cooking box, notice circled in red are the items you can cook in order to craft the box. You only need to choose to mass produce ONE of the many items listed.
Once you have the meals you need for eg : 18 meat croquette/ 6 crispy meat croquette, press L to bring up your proccessing window (or head to your local storage and press proccess if you have maid outfit on), click on the imperial cuisine circled in red and then click the start button to craft the box.

And TADA! you're done
TO NOTE
- Unlike Cooking and Alchemy, Imperial Fishing quantity is NOT RESTRICTED and the amount you can trade in IS INFINITE
-

note that these numbers determines the amount of trades available in the current server you're on, once it hits zero(0), you will not be able to trade in your boxes till the next refresh.
- Every Refresh is 3 hours the refresh time is 0000H, 0300H, 0600H, 0900H, 1200H, 1500H, 1800H, 2100H.. rinsed and repeat every day. (all time is in server time/local time GMT+8)
Return to top
Node uses and how to activate
Node(s) is a point/ location in which either tasks can be assigned on, mobs spawn on, or used for connecting towns, upon connecting nodes by activation, you gain new trade routes and benefits as well as tax reduction should you transport your goods from a location to another, in order for you to send workers to gather from nodes which possess a material you want/ need, you have to activate the node by investing in it and then invest on the item you wish to send workers to (investing consumes contribution points and energy.)
1. if you have 30day value pack, press M, click on the node, (*) on the top left you will see (invest contribution) click on that button (*)
2. (this is only if you dont have value pack) walk/run/ride a horse/swim/ sail/ crawl/ roll/fly(you get the point) to the node you want to activate, talk to the node manager, he/she/it will have function "node management", click on that and repeat this step (*)

Return to top
Strength, Breath and Health
Strength : each lvl increases your total Weight
Breath : each lvl increases your total Stamina
Health : self explanatory here.
You gain breath xp actively while you walk so you don't have to worry about this as it will level unless you don't move your char
To increase health xp, you need to eat food, the higher grade the food, the more xp. (and no, potions and elixirs does not count)
How to train/gain strength?
Activate a node (any node will do), after activating a node, speak to a trade manager, buy a trade item(pack) walk with that trade item to increase strength xp (yes it's better to do this while away cuz it'll take awhile to lv)(best to set an auto loop path within safe zone and unhindered by any obstacles and or npc.) (to set auto loop path, open map with 'M' key, right click an area, the moment you right click, you should see the 'Auto Loop' button pop up on screen, click on the button and your blue auto path should now glow in green, which means the auto loop is active, now all you have to do, is simply press 'T' to auto walk.)


-note strength xp only increases with trade crates and packs not the normal trade items you get from monsters, Also the more trade crates/packs you carry + the more distance you cover with that amount, the faster your strength levels (so try not to put too many trade items on your char) keep it slightly above 100% weight to maximize your xp : time taken
Return to top
So, how do I purchase trade item/pack?
TO NOTE: PLEASE IGNORE EVERYTHING IN TRADE ITEM GUIDE AS IT IS NOW OUTDATED AND CAN NO LONGER BE REPLICATED AS P.A. HAS REMOVED ALL TRADE ITEMS FROM TRADE VENDORS AS SUCH, THE ONLY RELATIVE WAY TO TRAIN STRENGTH NOW ARE WITH TRADE CRATES WHICH CAN BE CRAFTED BY YOUR WORKERS!!
you have to activate a node, once that's done, speak to a trade manager, (some trade items requires a certain lv in Trade proffeciency, so you need to either be at that rank or higher to purchase that trade pack),

once you speak to a trade manager, he/she/it will show you the items you can purchase from him/her/it, just click the buy button, input the amount you want, (u can change the amount by clicking on it), and click the purchase all button at the bottom right

Return to top
How do I gain trade xp?
TRADE XP GUIDE IS NO LONGER RELEVANT DUE TO THE TRADE CHANGES P.A. MADE, AS SUCH THE ONLY VIABLE AND MOST EFFECTIVE WAY IS STORING A TON OF TRASH CRATES ONLY TO MASS TRADE ALL THE CRATES YOUR WORKER CRAFTS ONCE YOU STACKED YOUR LIFE XP BUFFS, IT'S EITHER THAT OR JUST KEEP SELLING ALL YOUR FISHES TO THE TRADERS IF YOU'RE LAZY
(nodes from 1 town to another needs to be connected for maximum silver profit) buy a wagon, buy trade packs and dump it all to wagon transport it yourself (the further you travel, the more xp and silver you get)
Semi away from keyboard gain trade xp? : (explore bdo continent till you find desert town)(pls connect nodes from calph to desert town for boost), hire workers there to collect stuff and pack them into trade crates, once done, using the storage transport function, xport the crates to calph, once the xport is complete, pick them up at calph and sell them to trademanager.
You can use 5 energy bargain for A TON of additional silver DEPENDING on your proficieny (professional/artisan/master/guru50)


How to know if you hitting something ?
this is it's normal state.

If you are hitting it, It would "change colour" something like this
(just picture it without the backattack/crit)

Return to top
Houses and it's uses
Houses can be purchased, and delegated to for certain functions in game, mainly 5 functions for houses :
1. Storage space
2. Crafting materials/armor/accessories/ships/ship gear/trade crates/costumes/etc etc.
3. Stable space
4. Lodging for workers
5. Residence
How to buy house for storage?
Click on the location u wanna buy storage space in (say for eg heidel)

Click on the ALL for drop down list

Click on storage and you will see Blue arrows, those tell you which houses can be purchase for storage use

Next select level on the top right hand corner, this allows you to see which houses gives the most storage upgrades for a minmum amount of CP (on condition that you have to purchase some of the houses before it)

to purchase a house click on it, if you cant purchase, click on the check condition button

a list will pop up telling you which houses need to be bought before you can buy that specific house, here, you can directly purchase them all by clicking the purchase all button and they'll be bought to default in reference to what you selected (ie: storage)

You can change to underwear/bikini and walk around kekw
![[video-to-gif output image]](https://im6.ezgif.com/tmp/ezgif-6-5266ebadcfdd.gif)
-Do Be Warned-
You will be unable to do anything besides some of the life skill like : cooking/alchemy/etc. as your weapons will be hidden.
How do I craft my own costumes?
similar to buying houses for storage guide, but instead of selecting storage, select costume mill, if you wish to craft higher grade costumes, select the level by the top right corner and search for as high of a lv as you can get in that town you wanna buy the workshop in.

same thing, once you select the costume mill blue *optional(and level)* arrows will pop up to show you where.

click the button to check purchase conditions if you haven't met them.

Remember that you will need to purchase a tailoring coupon from the pearl shop under function tab, should you wish to make the costume into a pearl item that can be equipped on top of your base gear.

How do I get my pet to a higher Tier?
Level pets to 10(max) to increase the success rate of t2, t3, t4 upgrade, note that you can only user pet with a lower tier than the selected as fodder.
Now on the top left circled in red is the pet icon, click it, nxt circled in blue, click check in all, lastly circled in green, click the exchange button.

Now choose the pet you wish to upgrade, and circled in black, click the exchange button, and it'll appear on the box circled in red.

Once done, notice circled in red is the grayed-out pet which means you will not be able to use that 'type' as fodder for upgrading the specific pet you chose and circled in red is the lighted-up pet that you can use as fodder.

Now, to avoid confusion only use Wizard Gosphy pets as fodder, as not only will you be able to fuse them with any 'type' they also give a higher % pass rate for higher tiers.

To get a Wizard Gosphy, press F3 to access the pearl shop, circled in red, click the pet tab and scroll down should you not see it, else circled in blue, type the name of pet in the search bar.

-to note- You may also get Wizard Gosphy from game related events such as adventure log/ redeem coupons given by your respective servers

Return to top
How to gain amity?
Amity requires you to have a conversation with the npc and play a mini game, first, speak to a NPC, click on conversation

Once selected, you will see amity gain requirement, for instance, this mini game requires you to fail to spark interest 1 time in order to continue playing.
So for this instance, select your lowest % conversation starter
-Some conversations have boosts to interest/favor level so do take a read and place them efficiently-

Once you're done click conversation to begin the mini game.

If the mini game is successful you'll gain amity, else = 0 amity.
-If you succeed you have the option to keep talking to gain x2/x3 the amount depending on how many times you successfully converse with npc-
-Do note that failing in any of the mini games in between conversations will lead to a TOTAL LOSS of your gained amity during the game process-
-Your current amity with npc isn't affected, only the one you gain during the game is subjected to loss-
-ps: you can choose to exit after 1 success if you feel that your rng isn't good-

Workers
What is a Worker?

Workers are hire-able NPC(s) that help you collect stuff from nodes.
You hire them solely to help you gather or craft stuff as you go around the world of BDO running your own quests/grind.
There are 5 grades of workers :
Naive (White)
Beginner/normal (Green)
Skilled (Blue)
Professional (Yellow)
Artisan (Orange-ish)
Artisan being the best and highest grade.
There are 3 types of workers :
Goblin
Pros : Fastest workers, use them to get stuff done quickly/ to gather resources asap.
Cons : Runs out of energy/stamina the fastest
-Better workers for Active play style-
Human
Pros : highest luck (basically means there's a chance to gather/get rare stuff)
Cons : jack of all traits master of none
-Better for semi-active play style-
Giants
Pros : Highest stamina(can work longest) and can collect more stuff per run
Cons : Slowest workers.
-Better workers if you're not around most of the time-
So, How do I hire workers?
(you can only 1 worker per town if you don't invest in Lodging (refer to how to buy a storage guide, replace storage with lodging in search))
Top right of your BDO, click on NPC button and then click on worker button to proc an auto path to the nearest worker manager.
-Do note that purchasing workers in a specific town, will resort in those workers returning to that town after working/collecting no matter how far you send them-

Once you talk to the worker npc, click on contract workers, contracting a worker requires 5 energy

Workers, contracted is at random so there's no telling what grade you will get, however you can choose to re-roll for another worker at the cost of 5 energy per re-roll if you're unhappy with the current grade of worker

Once you're satisfied with the grade, click on hire worker.

Return to top
How do I check my workers? (this is only if you have a worker) click on the top left worker button, this button is your 1 stop worker management

Here, you can fire workers, cancel job requests((you usually only cancel if you want them to do something else or promote them)worker will only stop working after his current job), change skill (not implemented), force complete promotion(30 pearls) or recover all worker's stamina (by feeding them beer( you can obtain beer from cooking it, buying from marketplace or by doing some quests which gives beer))
each worker can take promotion test max 3 times(lvl 10, 20 and 30) , if they fail to promote, they are bound to that grade forever.
The number beside the rank button represents the chances they are left to promote.

How do i send workers to 'work'
Click on node with material that you want/ need

Circled in red, invest contribution in the node then, circled in blue, invest contribution on the material you wish to gather from node.

Select material by clicking icon

Circled in red are the workers you have that can collect from that node, circled in blue are the towns the workers are hired from (determines which town's storage the mats will be in when the worker is done collecting.), circled in black, click on the start work for workers to begin collecting material

-Note that your workers will not repeat task once they complete it unless you click on the repeat button-
To do so, circled in red click the manage worker button, circled in blue click the repeat all button (only works when your worker has accomplished task and if you have said materials to craft / deliver), circled in black, click recover all and select the food item. (only works if you have food for workers EG: Beer/ cold draft beer/ grilled chicken meat/ etc..)

Enhancing Guide
Where do I get more Blackstones?
Force enhancement vs Normal enhancement
Durability
FailStack (FS)
Gearing
Gear score (GS)
Safer way to enhance
What gear to aim for?
Where to get?
Any monster you kill has a chance to drop blackstone(weapon)/blackstone(armour)
-You can also exchange hunter seals for black stones-
or you can simply just buy them off the market place.
Force enhancement vs normal enhancement
Force enhance :
Pros : 100% pass rate at the expense of X number of black stones and durability
Cons : more costly.
Normal enhance:
Pros : Waaaaaay more cheaper than force enhance
Cons : requires you to have fail stacks at higher enhancement levels
How to restore durability of an equipment?
By using either memory fragments or the same weapon set.
Speak to Blacksmith, click on repair durability


As repairing max durability doesn't repair innate durability, you'll notice there's a grey area

so remember to repair equipment before setting out on your journey in serendia/mediah/valencia.

Fail Stacking (FS)
Every time you fail to enhance an equipment, you gain (N) number of Failstacks or FS for short, the number of failstacks you gain depends on the type of gear and the type of enhancement you are attempting, where armor/weapons would give you 3 FS all the way up to 8+ fs the higher the enhancement level and Accesories would give u 1 fs regardless, the more FS you have the higher your enhancement success rate and yes, there isn't a cap on max FS.
Please note that the game has a pity system in place called Essence of Agris/ Ancient anvil for the vast majority of your enhanceable equipments now, that being said, failstacks are still fundamental if you do not wish to spend billions of silver tapping; the pity numbers vary depending on gear type and enhancement level going from as low as 3 pity to as high as 1000 pity for obliderating(a.k.a PEN V)fallen god, for more info on the amount of times you need to fail in order for pity
How do I check how many FS I have?
Open up your blackspirit and click on enhancement. Your enhancement chance(+"N") = your "N" number of FS

or to check other character's FS, press esc, press disconnect to load this page, notice each character has this red colour firey rock beside them bottom right, the number on the rock, represents the number of FS you have.
 So how do I get FS effectively?
To do this, you'll need a ton of extra blackstones (doesn't matter which), now, buy cheap+11 equipments on marketplace, now spam your blackstones on +11 to get as much stacks as you can.
-stated below are just recommended FS for end-game equipment that shouldn't be followed too religiously, it's just a guideline-
(Please use FS guide in reference to the one posted on discord if you aren't gonna up boss gear/ super rare items (eg: Ogre Ring, Tungrad, etc))
equipment wise
+15 - 20 FS reccomended for anything below PRI : I or DUO : II
+30 - 45 FS reccomended for DUO: II to TRI: III
+45 - 90 FS reccomended for TRI : III to Tet : IV
+80/90* and above for Pen : V
Accessories
+17 - 25 FS for PRI : I
+25 - 35 FS for DUO : II
+45 - 60 FS for TRI : III
+100 - 120 FS for Tet : IV
+120* and above FS : Pen : V
Black star Gear
+20 - 25 FS for PRI : I
+30 - 45 FS for DUO : II
+55 - 65 FS for TRI : III
+100 - 125 FS for TET : IV
+130 and above for PEN : V
Dead God/ Fallen God
+80 - 90 FS for PRI : I
+100 - 120 FS For DUO : II
+130 - 150 For TRI : III
+150 FS and above for TET : IV and PEN : V
Please use SEPERATE STACKS FOR ALL ENHANCEMENTS, TREAT EACH ENHANCEMENT AS AN INDIVIDUAL, DELEGATE YOUR STACKS EFFECIENTLY OR YOU WILL END UP REGRESSING TO PRI 100%.
Gearing
How Do I Get better gear/ gear score?
You will need to enhance ALL your gear, as high as you can possibly get.
At the moment Pen : V enhancement is the highest for any equipment in all servers. (the only main current exceptions are as follows:
1. 1* tuvala gear(family-bound quest), 1* tuvala accessory (family-bound quest),
2. all Kharzhad(pve) / all Preonne(lifeskill) accesories
3. Soverign Weapons
ALL of which can be upgraded to a max DEC (X), to note : kharzad and preonne accesory enhancements DO NOT consume/destroy the accesory upon failure UNLIKE normal accesories.
Add : the 'new' enhancement names are as follows : Hex (VI), SEP (VII), OCT (VIII), NOV (IX), DEC (X).
To enhance gear, simply open up black spirit npc, dump a black stone (armor)/(weapon) in together with the desired armor/weapon to enhance and click on enhancement.
Now, for accessory enhancement, it's slightly different, to enhance accessory, you'll need 2 of the same accessories.
Dump it in the enhancement slots and pray for the best because for accessories, if you fail to enhance, both accessories will be consumed/destroyed.

Now, you may be wondering, BUT MY RNG SUCKS BALLS! Is there a safer way to enhance?
yes, this little bugger called Cron Stone, and Carphras Stone guarantees your enhancements.


plus side of using crons, say for example you're enhancing a weapon/armour from DUO to TRI, now failing a DUO - TRI enhancement will most likely result in the armour/weapon dropping it's previous Rank, so if it was DUO : II and you fail, it'll become PRI : I again, this is where cron stones come in, these buggers prevent your item grade from dropping if enhancement fails.
you could also use these to secure one of the 2 accessories used in enhancing if you fail (but as for accessories, cron stones do not prevent enhancement dropping, they only prevent 1 inherent accessory from exploding)
the only set back of using this is that upon failing, you do not obtain any failstack(s) as you normally would without using cron stones while enhancing.
Carphras stones on the other hand CANNOT be used on accessories and it works on a "leveling system"

with it's max level being 20, the way this works is in exchange for gambling your chances with a regular concentrated stone, you can use this stone to increase your item to level 20, and then when it's at max level, you will have a 100% rate enhancement. This stone however, can only be used on items DUO : II and above, also do note that carphras stones required increases with item level and enhancements. Pros of using this stone : it adds + 1 ap/ + 1 dp (weap/ armor respectively) for every level, so +1 for lv 1, + 2 for lv 2, end game your stats will be more than normal enhancements. cons : VERY expensive, requires well over 18billion in funds to enhance 1 item to pen, long progression.
Return to top
What kind of Gear should I get?
Mid tier gear: Roaring magical armor (a.k.a exchanging dim magical armor from main quest) unless you too much money then (heve, grunil, zereth, agerian)
End game : Dim tree armor, Bheg glove for accuracy if not Leebur's if you dont need accuracy or planning to build a tanky ver of your class for nw/pvp (not reccomended for dps classes like archers, rangers, musa, maehwa, dk, sorc and tamer), muskan shoes for evasion or urugon for heavy ap builds, giath for survivability or griffon's helmet for resistances or pen heves for pure evasion builds
Accessories
'>' means progression not better than
rings : Sealed ring > Mark of shadow > ring of crescent or cadry > Tungrad
belts: basilisk belt or Centaur or Dim tree > Tungrad (cheaper mid tier : Ancient weapon core or tree spirit belt)
necklace: Ancient guardian seal > Serap > Ogre or Layten > Tungrad
earrings : if you are anything other than a wiz/witch you will need 1 Red coral earring (rce) but for your second earring, Sealed > Rce/Bce/Witch > Tungrad
-cheaper mid tier alts for all except belt : Manos, Blue/Red coral or sealed-
Main hand Weapons -
Save up for any of your main + 15 green weapon if you are new to game
-Reccomended Bares/ Yuria (yuria has the most AP, bares is the second best staff as it has + dmg to all species incase u run into some low lv pkers-
For end game
-Depending on if you are a mage or not-
-> you can decide to go Kzarka or Offins
-> mages(both wiz and witch) don't really need the acc boost from kzarka weapon and the 8ap diff at max upgade doesn't really make a huge loss for mages, I mean this is totally up to you.
Off hands
same logic as main hand. get any + 15 green, it's good enough to last you to even late game(whr u will swap out for a boss off hand)>> ( don't bother dumping extra blackstones for PRI or abv green eq(unless u trying to get failstack or you too much to spare))
end game
For all classes theres nouver and kutum, with nouver being the more offensive one and kutum being also a must have for kama grind unless you have 270ap then kutum is optional.
-> heres where the decision lies with whether you want to balance out your DP with ap or just dump more ap in your alr god like dmg-
-I may have mentioned this but I'll say it again
To solo all of BDO content with ease (Pve) you would minimum require most of your eq to be DUO (II), unless u wanna kama grind, then TRI and above is a (MUST)
-PVP wise-
it does boil down solely to your gear, unless both gear score roughly similar/ totally same then it's all skill based. (Though some classes have a more clear advantage over others ) (just don't play witch if you favor or find yourself in a 1 : 1 / 1 : x situations cause witches don't do well in pvp context lest they outgear someone)
Refer to Enhancing guide , on how to get a better gear score/ make your gear stronger.
Return to top
Bartali Adventure log summary
Before you start doing your bartali adventure log, these are some of the things you can do/ prepare before hand
ps : I skipped pages where tasks were straight forward and self explanatory.
-participate in nouver world boss to get a chance to obtain Desert Tyrant's Mane, you need 3 of this, hold on to it, do not throw it away
-participate in kutum world boss to get a chance to obtain Ancient Creature's Fragment, you need 2 of this, hold on to it, do not throw it away
-complete all 11 palm forest boy questline
-buy or grind 50 forbidden book
-rent or buy matchlock
-buy old tanning knife from bher material npc
-buy witch of horror scroll from loyalty
-buy or grind for base witch earring
-buy 3 CONCENTRATED HERBAL JUICE
-buy knight combat ration
-buy or preorder pri kalis necklace
(if preorder takes too long, buy base kalis necklace and tap to pri or buy mysterious necklace from blacksmith and open the mysterious necklace
till you get 2 base kalis, tap it to pri)
-buy, preorder or craft a base manos ruby necklace
-buy and register farm wagon
-buy mud water
-buy special valencia meal
-buy 1 hour dummy training manual
-buy 3 explorer compass parts
-buy desert tent from sandgrain stable keeper npc
-do camel quest
-buy agrakhan and moghulis scroll from loyalty shop
-buy shakatu villa pass
-do mininature elephant quest from sandgrain stable keeper (quest available after completing camel quest, Items required for quest : 100g * 3, Empty Bottle * 20)
book 2
buy and consume trade item from trent trade manager npc for knowledge
kill treant forest monsters
book 3
kill crows in hexe sanctuary
book 4
while doing book 4, using a hoe gather silver azalea
while doing book 4, use proccessing to heat up water.
while doing book 4, use syringe to gather blood yill you get crystal trade item
while doing book 4 gather ogre blood
book 5
Use simple alchemy from L tab to proccess concentrated herbal juice
consume knight combat ration
book 6
type /s enter to bring up general chat, type in 12.
book 7
while doing book 7, using hoe gather everlasting herb
while doing book 7, play sunrise herb mini game at florin
find a animal npc called lost lamb that spawns somewhere in the highlighted region, catch and interact with the lamb to carry it, bring the lamb back to velia and interact with ishin
bartali in the inn

book 8
ride the farm wagon.
while doing book 8, cook beer and pray rngesus to get cold draft
while doing book 8, craft wise man blood, buy 2 clear liquid reagen, 4 fox blood, 2 trace of ascension, 2 monk's branch
book 10
combine 50 forbidden books and run all 10 cartain spells scrolls.
book 11
consume mud water
consume special valencia meal
dummy train
book 12
talk to npc standing outside of scarlet sand chamber where kutum spawns, show her the Ancient Creature's Fragment
assemble explorer compass
use desert tent out in desert when map dissapears
ride camel into desert
book 13
find and kill cadry elite mob (NOT GATEKEEPER.)
find and kill gahaz elite mob
summon and kill Agrakahn (untested : killing rift or scroll muskans may complete this as well)
speak to shakatu villa npc
ride a mininature elephant.
book 14
find aakman portal, go in and speak to aakman general goods npc
go to sand grain bazaar, speak to the trade manager and show her the Desert Tyrant's Mane
Complete the following sets of npc knowledge to obtain the next two pages.
Topography
Valencia Entrance 2/2
Valencia Great Desert 3/3
Eastern Valencia 2/2
Character
People of valencia
valencia capital merchat 2/2 (if this does not complete the last page, then try obtaining the below stated as well)
farm folk of valencia 2/2
people of shakatu territory 1/1
people of sand grain bazaar 1/1
A katan officer and a soldier 2/2
People of rock post 1/1
people of the oasis 1/1
people of easter valencia 1/1
Book 15
while doing book 15, gather 10 lion meat
look for artifact in basement of valencia castle
climb up valencia castle tower look for painting on wall.
Return to top
How to cook / do alchemy
To explain how to cook or do alchemy, first you need to know what you want to cook / craft, open up your Crafting notes in the menu, under information F1, crafting notes 2. Search for the item you want to craft and the materials you need the Aquisition numbers denote the amount of ways you can craft the item so you only need to pick one aquisition method and get materials needed

Now that you found your recipe, purchase a cooking utensil either from an chef npc in town or in central market, buy any house for residence and place it in your House.
once you have bought a house, navigate to your house by clicking this icon

place down your cooking utensil


once done, interact with your cooking utensil, right click the materials suggested in the notes to place them in the pot and click start cooking. (PS you have to insert the exact amount, not more not less, if you wish to cook more than one, DO NOT USE THE TOTAL AMOUNT (eg : 5 wheat to cook 1 beer, but you want 100, DO NOT PUT IN 500 wheat, PUT IN 5 WHEAT AND USE THE BATCH PROCCESSING BUTTON INSTEAD! heed this with caution or you will lose unecesary amount of materials just to produce 1 beer.)

Return to top


No comments:
Post a Comment